# Inventory
# Create Inventory
From the top menu navigate to the Inventory screen

From the right hand side of the Navigation Bar select the "+" icon

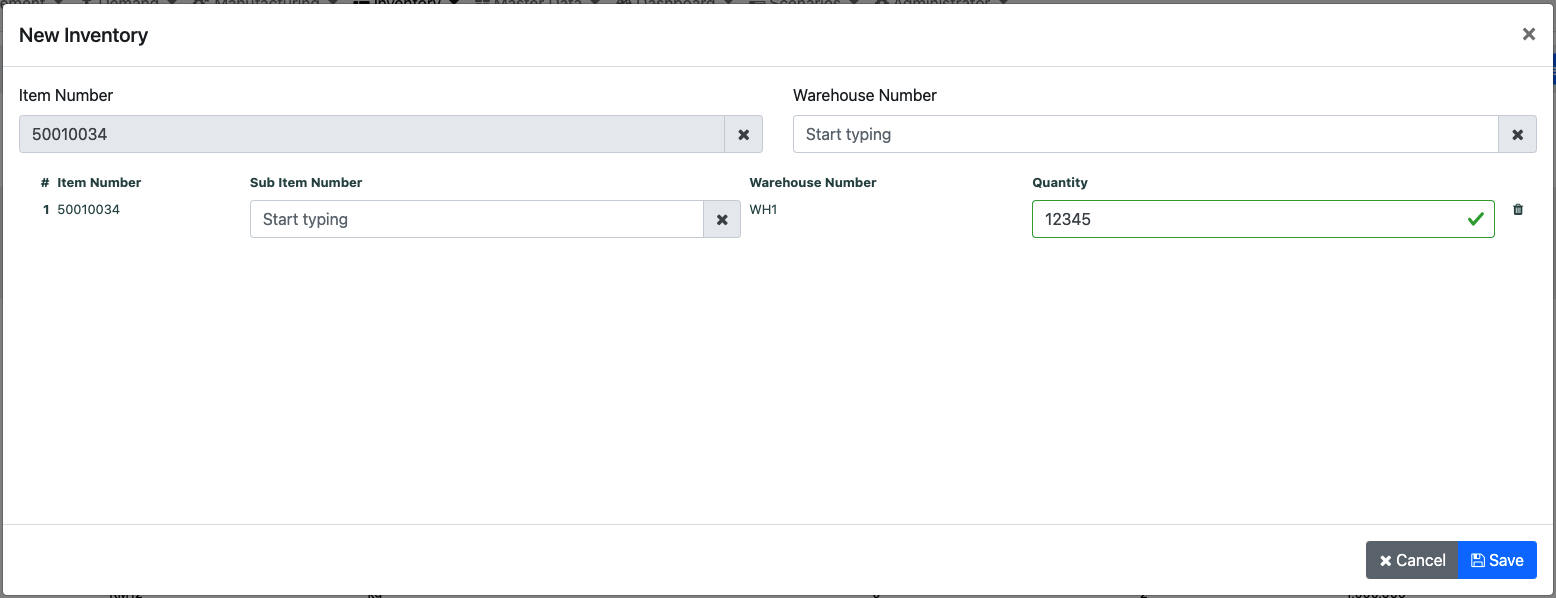
A pop-up will appear where you can enter the details of the New Inventory
You need to select the item number for which the inventory will be created

Then you will need to specify the warehouse

You can specify the sub item number (if any) and the quantity
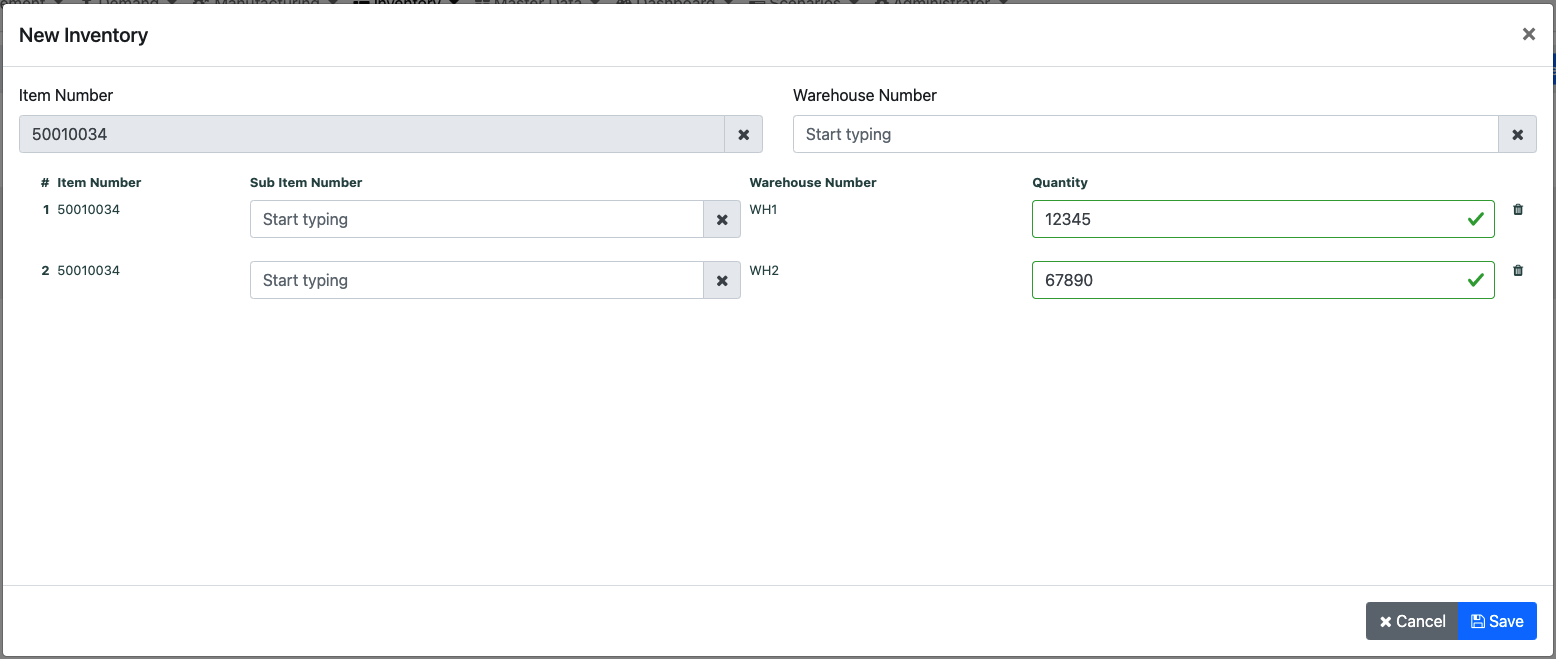
You can also add inventory in multiple warehouses by repeating this process
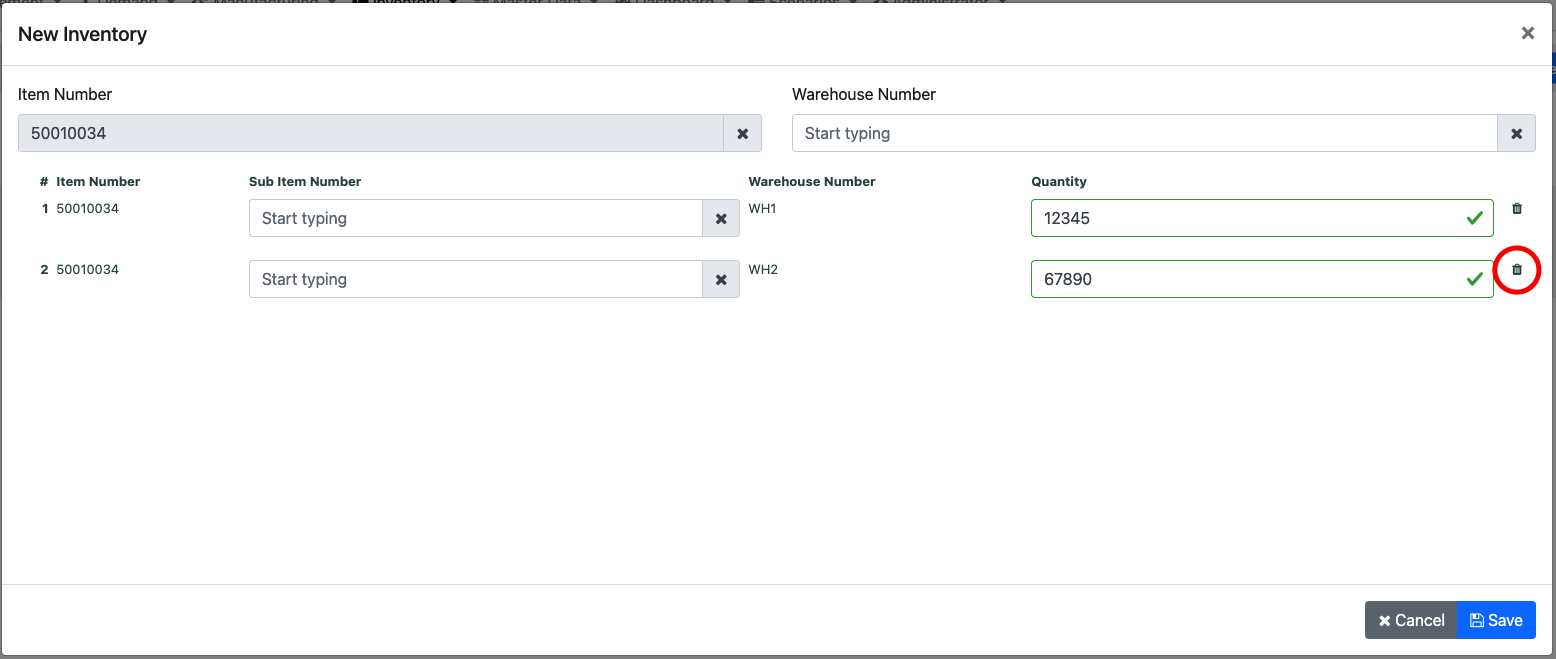
To delete a warehouse from the inventory simply click on the trash can icon
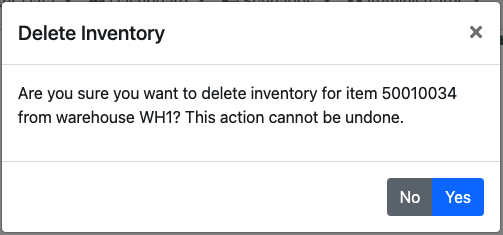
A pop-up will appear for confirming the action
# Edit Inventory
From the top menu navigate to the Inventory screen

Hover over the inventory you want to edit and on the right hand side click on the edit icon

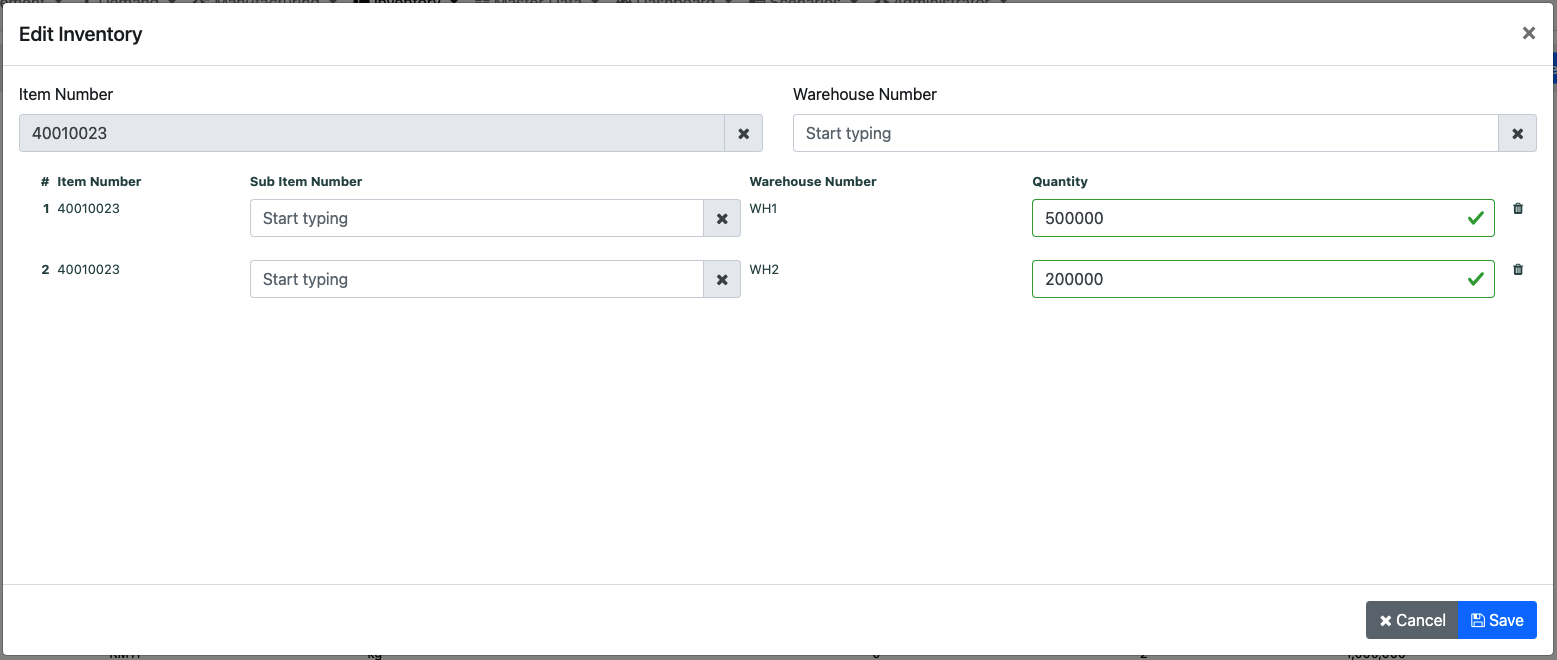
A pop-up will appear with the details of that item
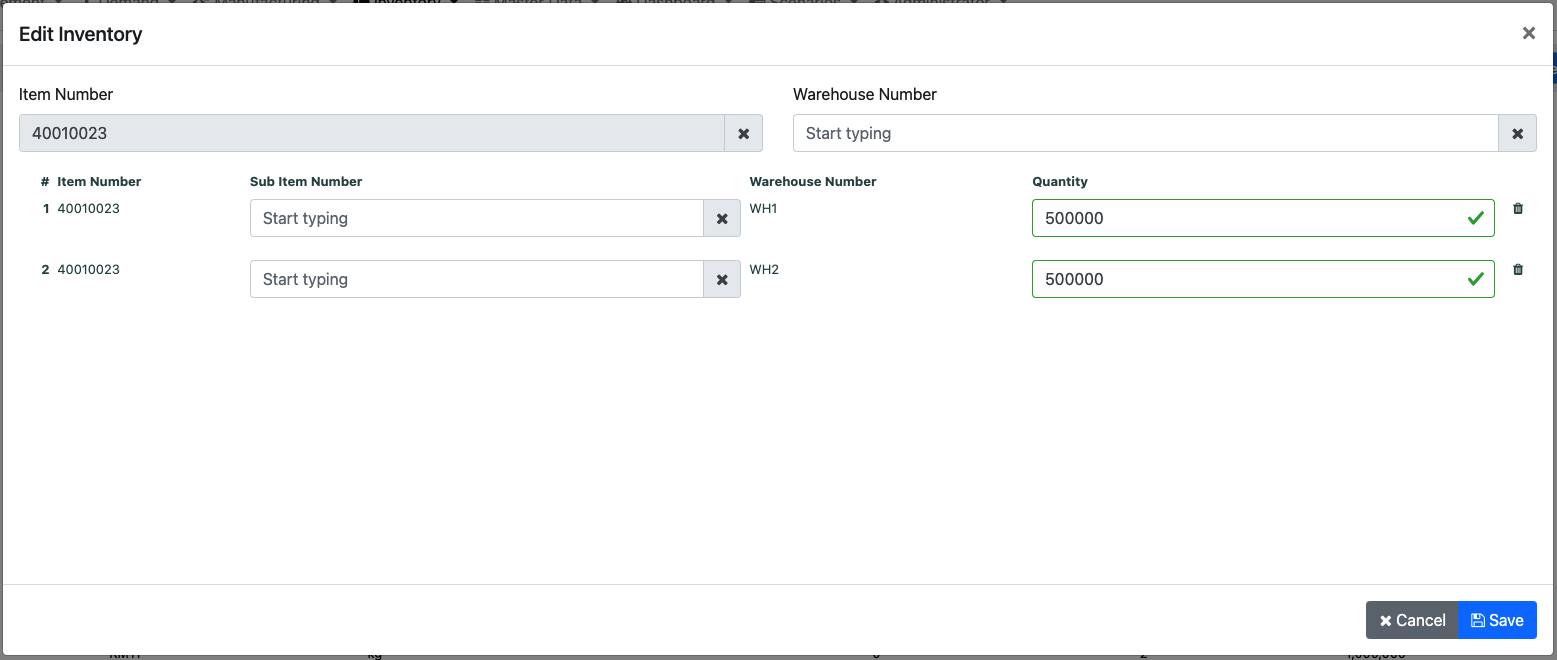
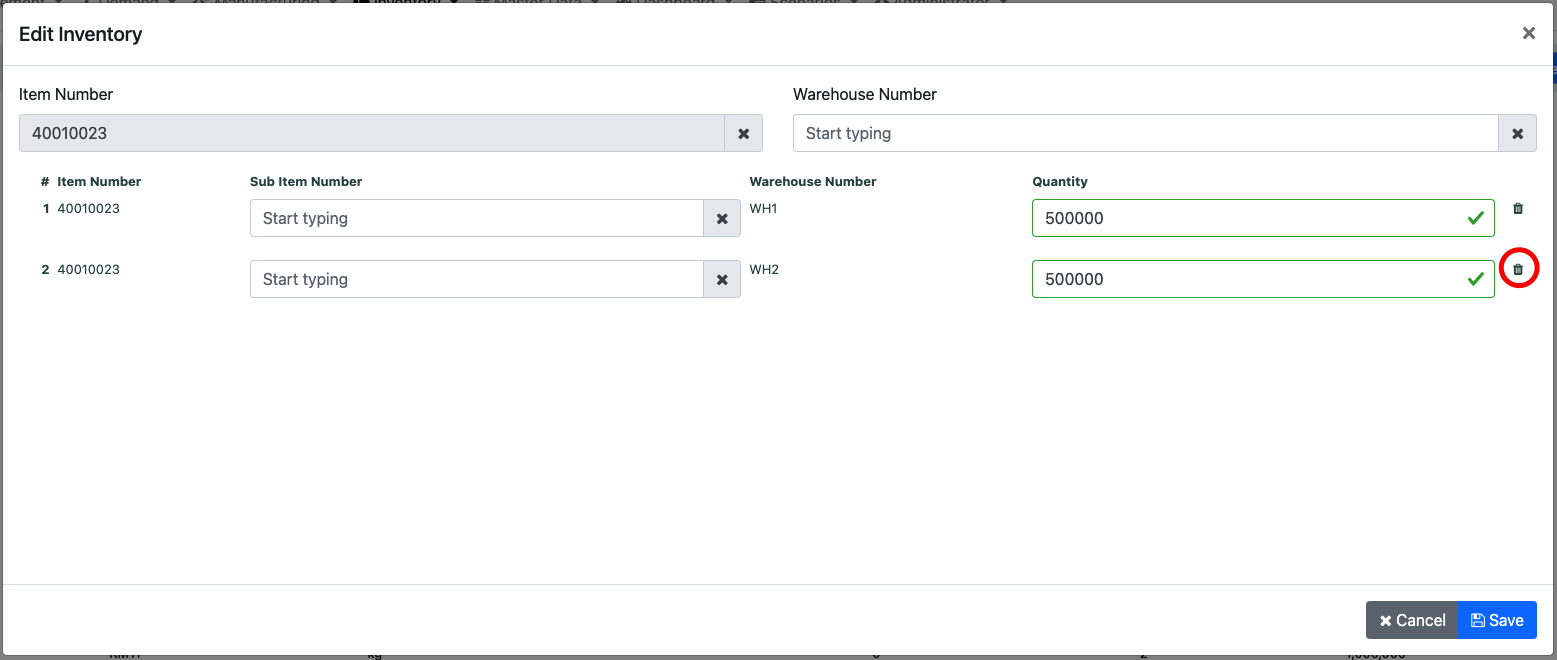
To delete a warehouse simply click on the trash can icon next to it
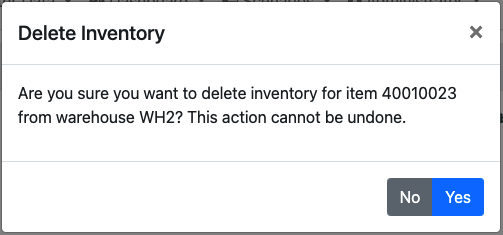
A confirmation pop-up will appear to confirm the deletion of the warehouse
If you want to add a new warehouse in inventory start typing its number in the warehouse number box and select it
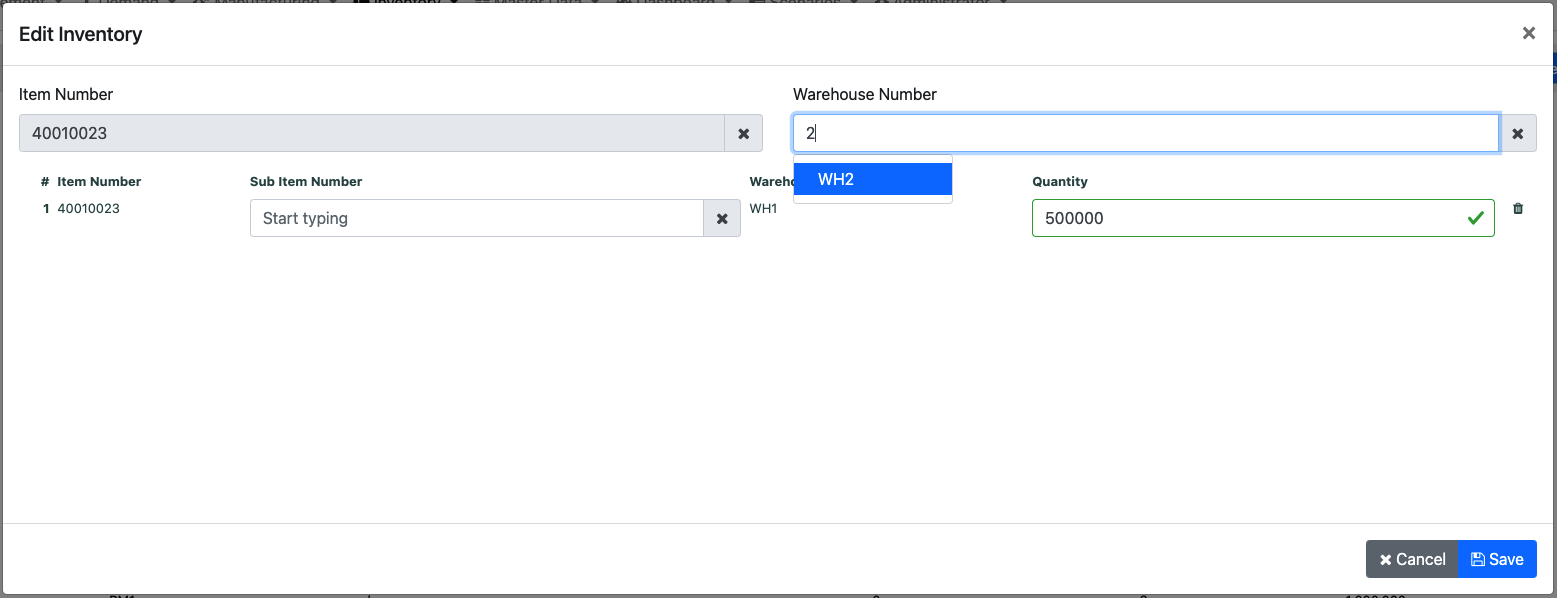
Update the details of the new line and then you can hit Save in order to save your changes
# View Inventory Details
From the top menu navigate to the Inventory screen

Select the inventory you want to see and click on the "+" icon

The screen will expand and you can see the details of one or multiple inventories at the same time

# View expected orders for a particular item
From the top menu navigate to the Inventory screen

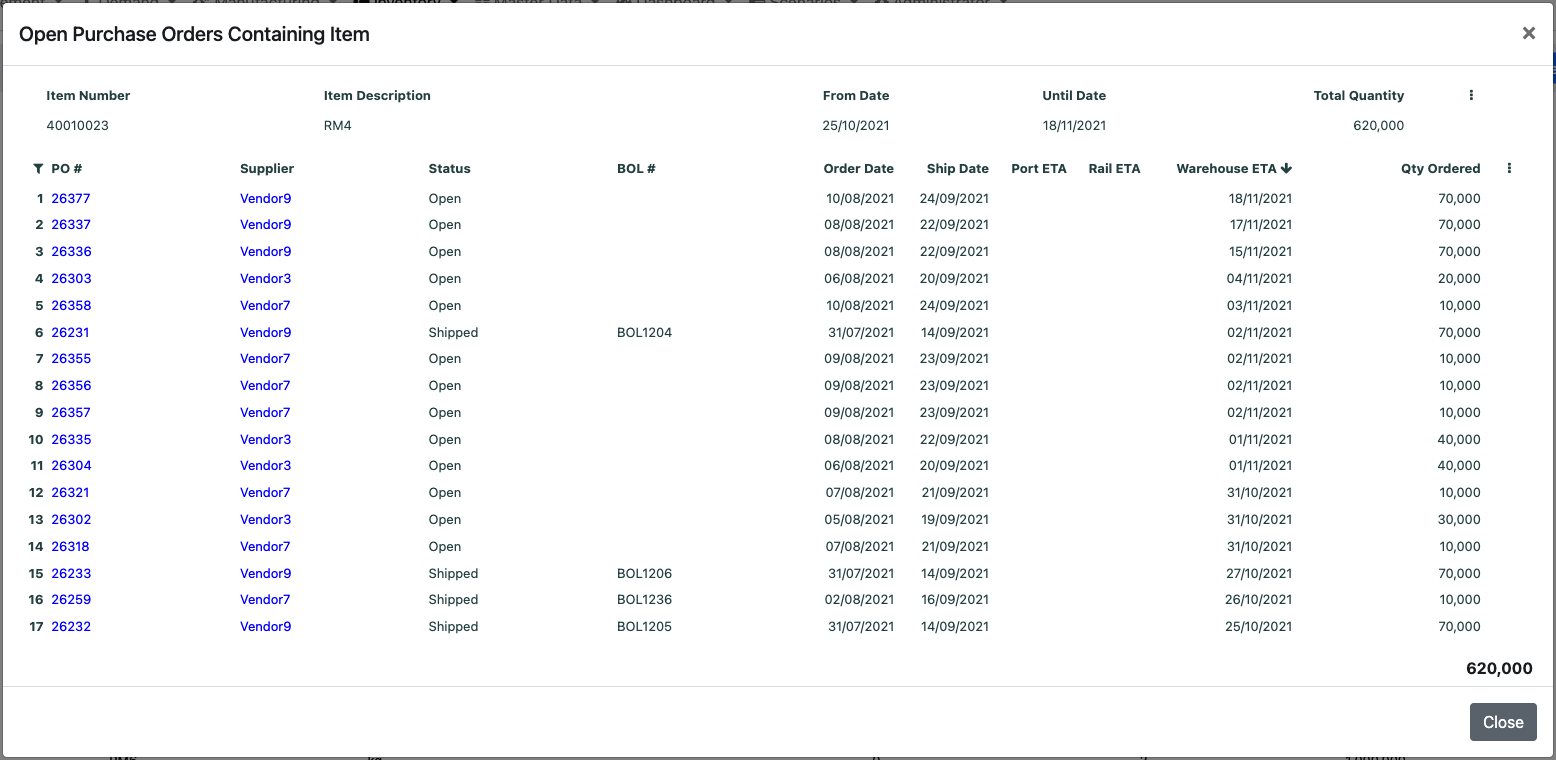
Select the item for which you want to see the expected quantity and click on its value

A pop-up with the open purchase orders containing this item will open. In this pop-up you can further drill down to see the contents of a particular purchase order
# Bulk upload data
Bulk data can be uploaded by using our templates, for more details on how to do this please consult our Uploading section
# Advanced actions
For customizing column names, order of the columns, creating and saving a view, exporting to Excel and other advanced features see our Advanced menu section
# Column explanation
# Header columns
# Item
Represents the item number that is used to uniquely identify an item in the system. This number needs to be unique, and can have both numbers and letters.
# Item Description
Represents the item description corresponding to a particular item number.
# UoM
Represents the unit of measure of the item.
# Number of Subitems
Represents the number of subitems that one item has.
# Number of Warehouses
Represents the number of warehouses where there is inventory for that item.
# Qty in Stock
The total quantity across all warehouses for a particular item.
# Qty Expected
The total quantity expected from all the non-closed purchase orders across all warehouses.
# Detail columns
# Item
Represents the item number that is used to uniquely identify an item in the system. This number needs to be unique, and can have both numbers and letters.
# Description
Represents the item description corresponding to a particular item number.
# Sub Item
Represents the sub item number (if any) unique at item level. This number needs to be unique at item level, and can have both numbers and letters.
# Warehouse
Represents the warehouse number that is defined in the master data.
# Quantity
Represents the quantity of that item/subitem available in the warehouse.
# UoM
Represents the unit of measure of the item/subitem.
